


SQL! SQL!! SQL!!! this term keeps coming up one time or the other and you have been telling yourself you would make out time to learn it and for some reason when you feel you are ready it appears daunting or you do not just get it. As a Data Scientist or a Developer who intends to add SQL to their skill set you probably already know how important knowledge of database can come in handy either to query large dataset or create an application that stores user data. In this blog post I will try to be as basic as basic can get in other to give you a clear beginning.
To keep things simple and save time and get straight to the point, I will skip the installation of PostgreSQL which is the database management system I will be using and pgAdmin which is the graphical administrative tool I would be using to access the database server as opposed to the psql command line which might be daunting for beginners. If you have not installed those yet there are so many videos that can guide you on that. I will recommend this video if you are running on a Windows OS and this video if you use a mac. In this tutorial we have two main aims which we are going to achieve together before the end of this blog post. Firstly you would create your first database and secondly you will populate that database with a table that contains data. Lets get started.
What is SQL?. It simply stands for Structured Query Language, now lets breakdown this definition. I will like to start from the Query part, from the English language it means to ask a question so SQL is a means to ask a question but who are we asking this question. This is where the Structured comes in. So therefore we can take SQL as the language we use to ask a structured entity questions. Now that we have this at the back of our minds permit me to go further. SQL is more than just a means of extracting knowledge from the data. It is also a language for defining the structures that hold data so we can organize relationships in the data. Chief among those structures is the TABLE.
A table is simply a grid of rows and columns that store data. Where each row holds a collection of columns and each column contains data of a specified type(dates, numbers or strings). Picture a typical excel sheet. A table can also be viewed as an entity made up of attributes(columns) where each row is an instance of that entity. At this point I think it is important to state that a database can hold more than one table and we make use of SQL to define the structure of a table and how each table might relate to other tables in the database, it is this process of table relationship in a database that brings about the concept of a relational database.The importance of tables in a database can not be overstated as merely studying the table or tables in a database can give you clues on what type of data is stored, the relationships between the data and how this can be queried.
Before we start writing queries, I think having a visual example to further explain what has been said above will be really nice at this point in time. We will have an imaginary database that manages workers in an organization and we would call this database "Workforce" that tracks an employee details. In this database we would have three tables namely "Department", ‘Employee", and "Project"
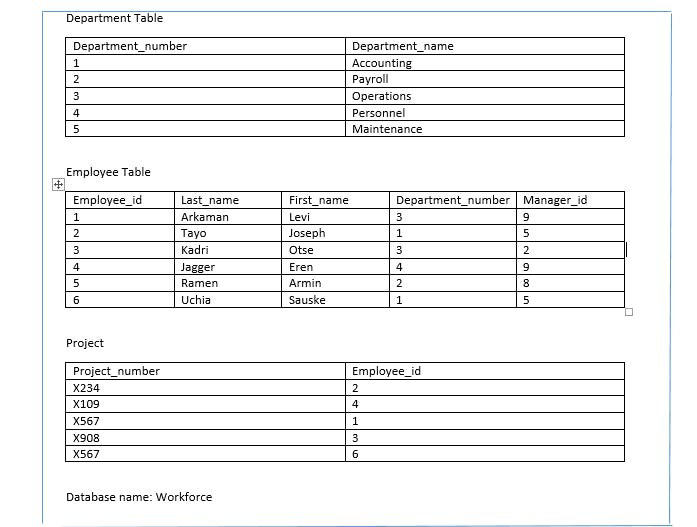
The Department table shows the different departments and the corresponding number assigned to each department. The Employees table gives details about the employee including their department_number. From the data shown we can see some employees are in the same department, notice department_number 1 and 3. The project table shows the project carried out by each employee. We can start to see the relationship between the tables in this database. One thing that I would like to point out now even though we would not dwell on it here is the importance of the Employee_id column and the department_id columns and how they serve as important keys to relate the three tables in this database. Now lets create our own database.
Creating a Database
Let me remind you I am making use of the PostgreSQL DBMS which when installed correctly comes with a default database called postgres. Right now we do not have any business with the default database. We will instead create a new one. I am using the graphical administrative tool pgAdmin to run the SQL statements that I write, any graphical administrative tool can suffice but for the sake of this post and ease of following along PgAdmin is recommended.
Steps
- Launch pgAdmin, then in the left vertical pane click the arrow sign to the left of the servers node to show the default server which depending on installation may be localhost or PostgreSQL x, where x is the version of the application.
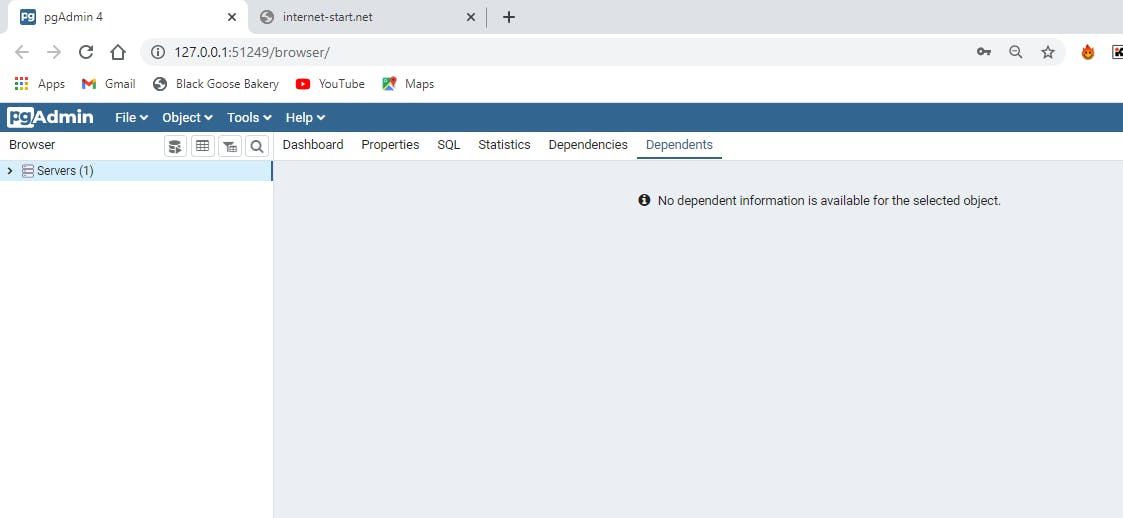
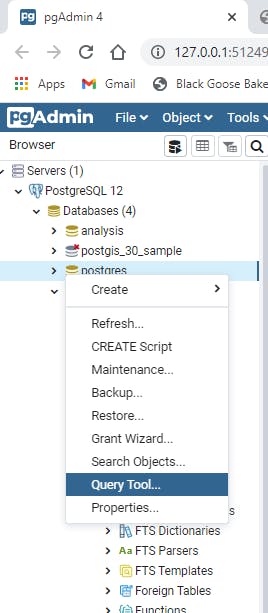
- Expand Databases and click on the postgres database to highlight it
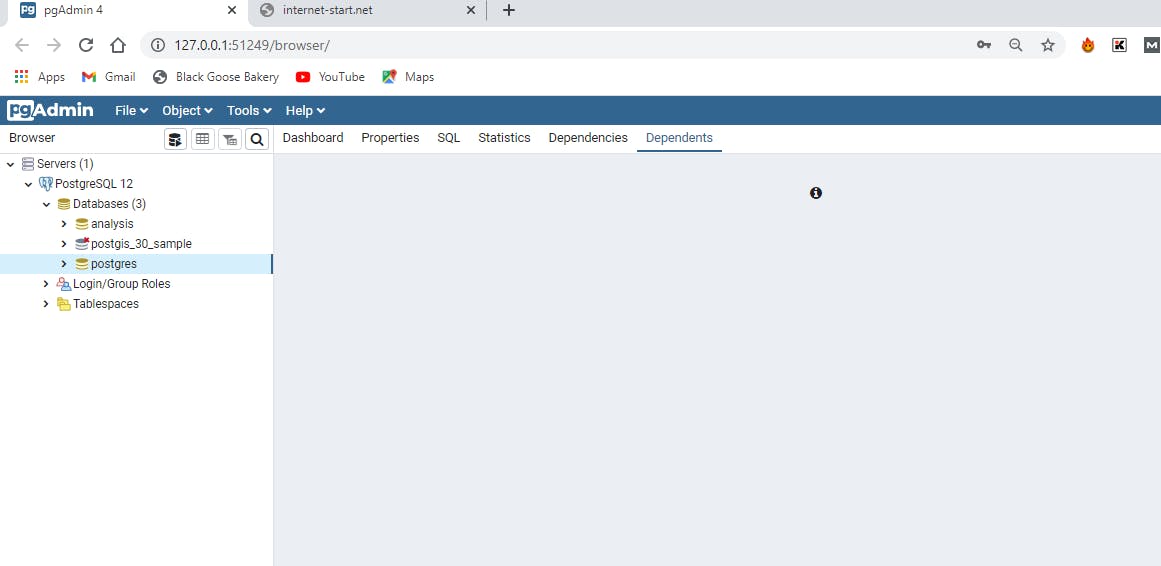
note if you have just freshly installed PostgreSQL and pgdmin4 you will only have the postgre database when you you expand the database as opposed to mine which already contains another database called "analysis".
- Open the Query tool by choosing tools -> Query tool
- In the SQL editor pane type the code. CREATE DATABASE tutorial;
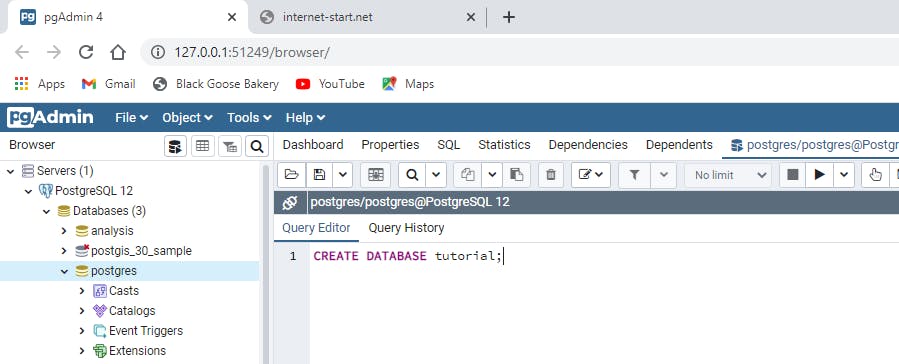
- Then click on the execute button or f5.
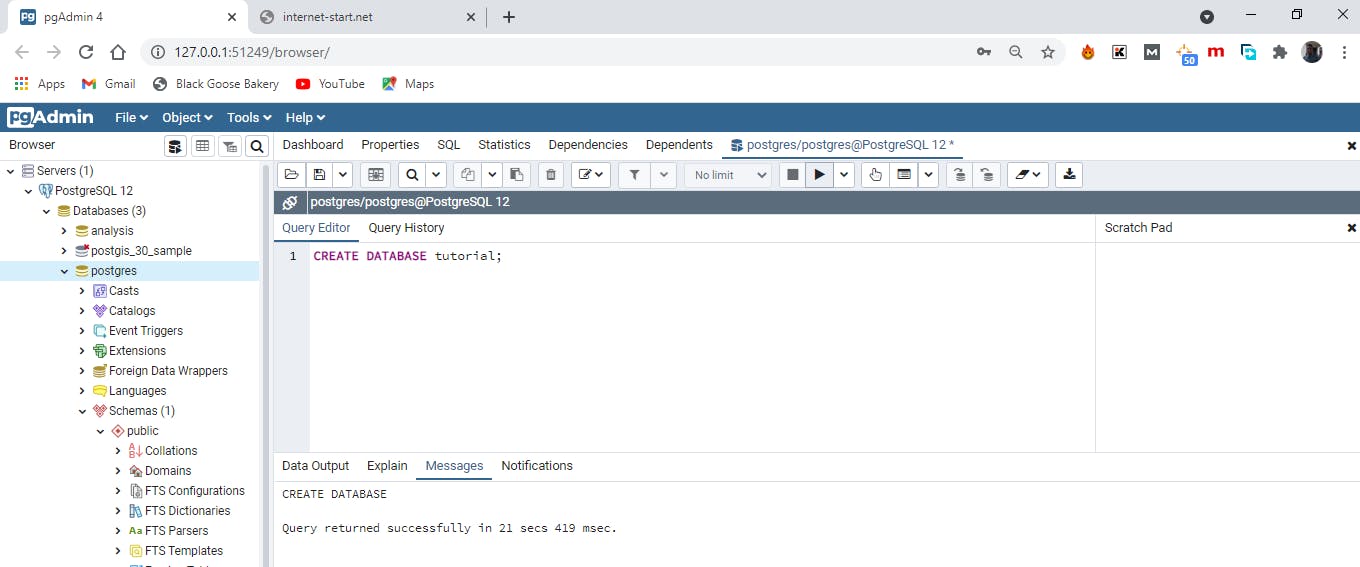
In the output pane of the query tool under messages you should get an alert that the query was run successfully.
To see the new database right click DATABSES in the object browser, from the popup menu select refresh.
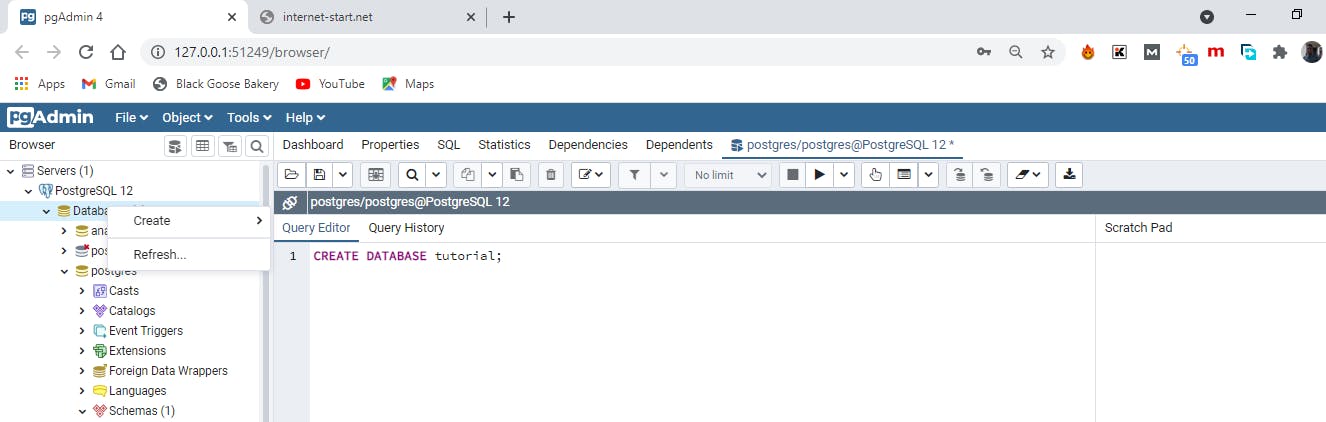
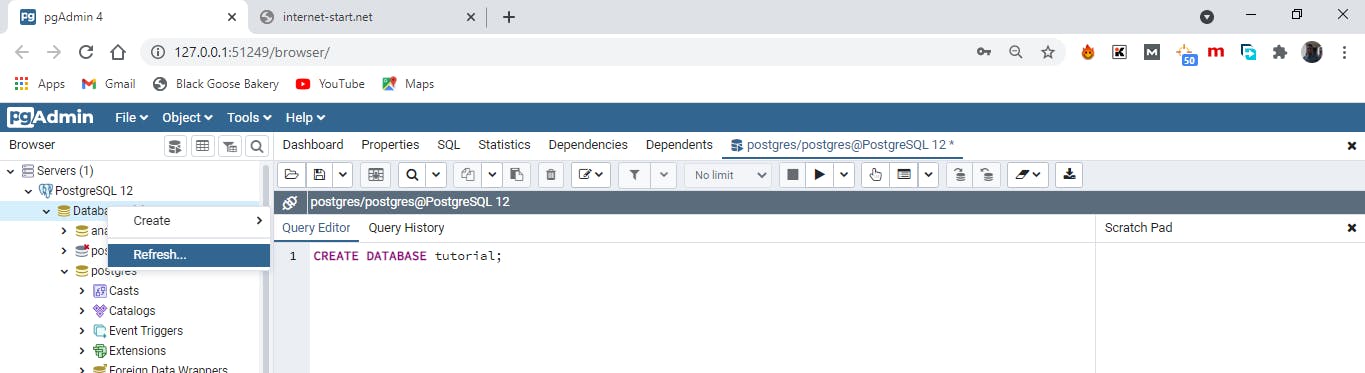
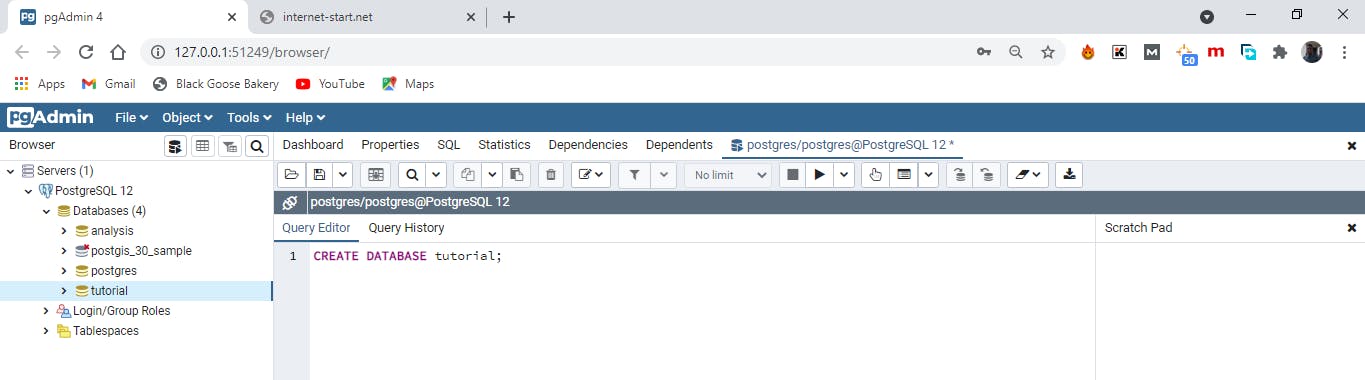
Congratulations you just created your first database. Hooray.
To connect to the tutorial database in the object browser click on the tutorial database, reopen the query tool.
Creating a Table.
Like I stated earlier the chief structure of a database is the table as that is where the data lives and its relationships are defined. To create a table we assign a name to each column, the column is sometimes referred to as a field or attribute and a data type is also assigned to each column. The assignment of a data type to a column is what determines what type of data can be stored in a column and the definition is one way SQL enforces the integrity of data. For example, a column defined as date will take data in one of several standard formats such as YYYY-MM-DD. If an attempt is made to enter characters not in a date format, for instance the number 12.56 or the word ‘orange’ an error will be generated. When a table is created i.e. defined with all its columns and data passed in, the table can still be modified if the need arise. Let’s write some queries.
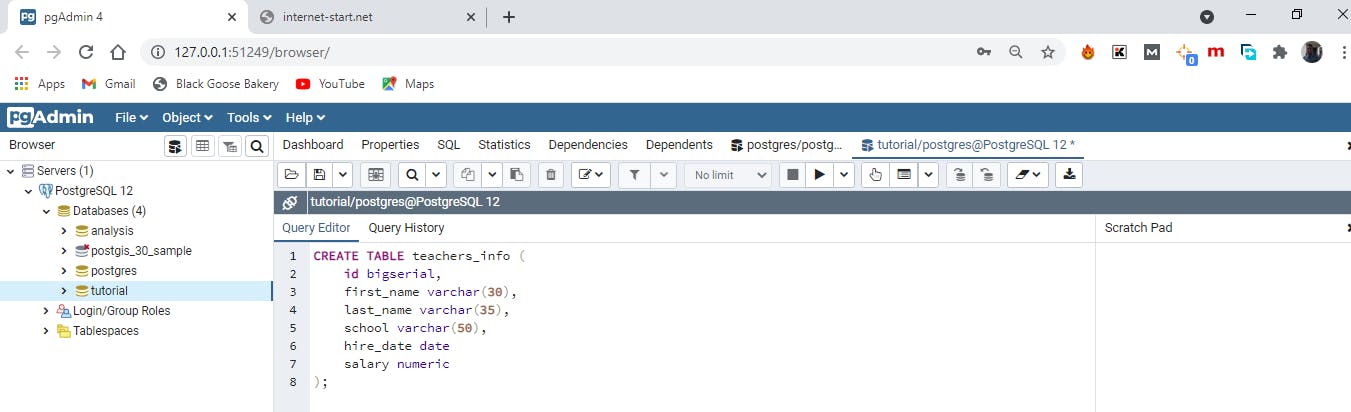
we will create a table called "teachers_info". Make sure you are in the "tutorials" database if not click on the tutorials database and then choose the query tool. Then the run the following query
When you run the query you should get a success message if everything goes fine.
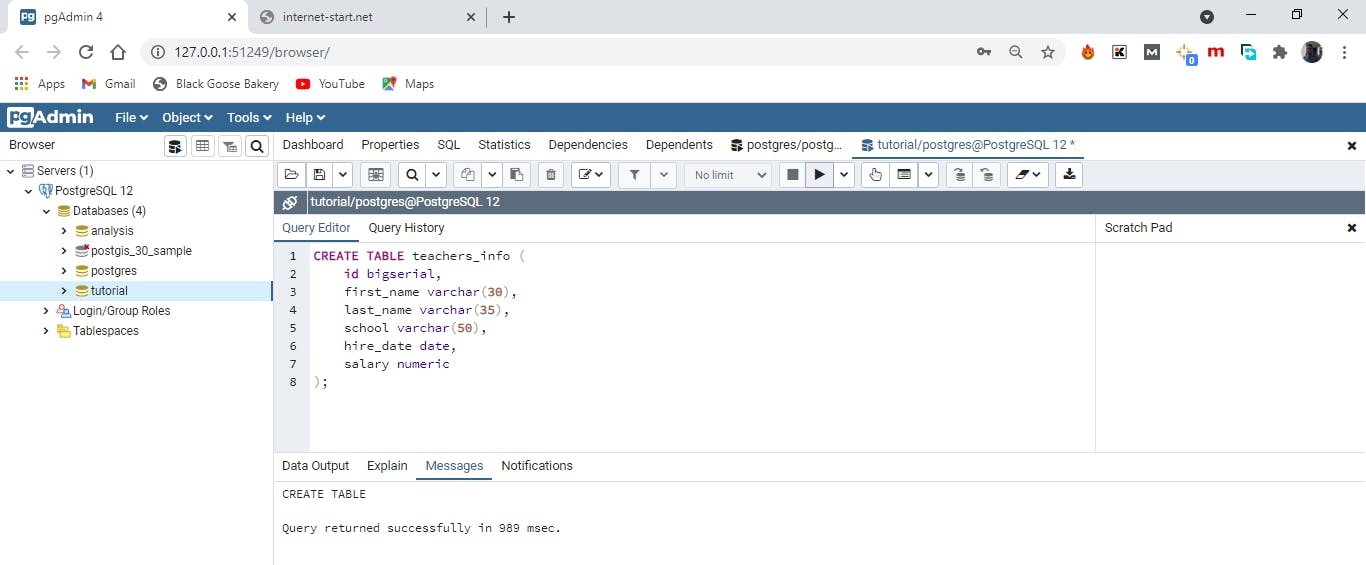
Expand the tutorials database and expand schemas, expand public there you will see TABLES expand tables. You will see the newly created table and if you expand this table you see the columns you defined. Congratulations again you created a database and added a table to it.
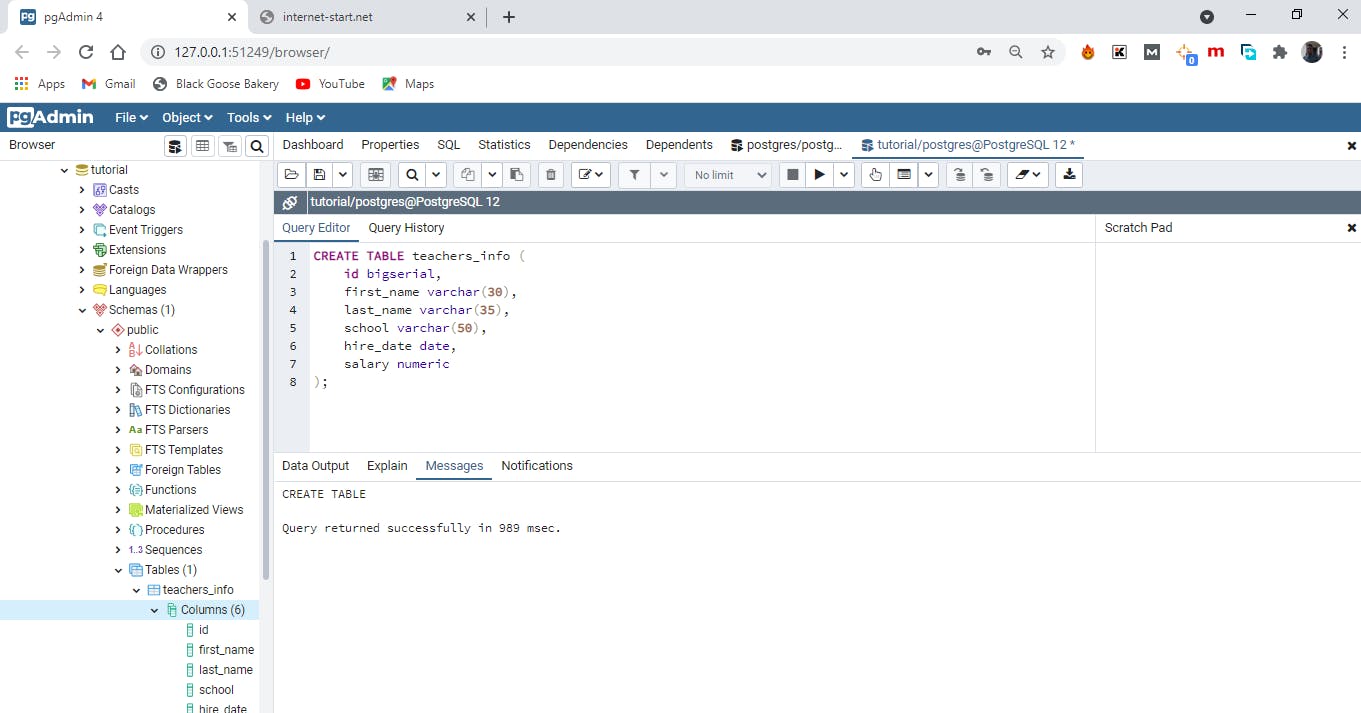
You might not understand the query which was used to create the Table now and that is fine, I will walk you through it.
The query begins with two SQL keywords CREATE and TABLE together with the name we want to give the table "teachers_info". This tells PostgreSQL we want to add a table to a database. Following is an opening parentheses, the statement includes a comma-separated list of column names along with their data types. To make things easier to read each new line of code defining a column is placed on separate lines and indented to the same level. Each column name represents an attribute of the table and it is defined by a data type. The id column is of type bigserial and this is a special data type that specifies that such column will be auto incremented whenever a new row is added. For example the first row will have an id of 1 and the second row will have an id of 2. Note the bigserial is a PostgreSQL specific implementation other DBMS have their won, MySQL for example uses autoincrement keyword to give the same effect. Next we create columns to account for the teacher's first name and last name and school where they teach each of this column is of the data type varchar, which is a text column with a max length specified by the number in parentheses. In this case we assuming no one will have a first name greater than 30 characters but we could be met with exceptions. The hire_date column is given the data type date and the salary column is numeric. You might be wondering how you will know what data type to give each column, do not sweat this for now. I will handle this in future blog posts. The main purpose of this tutorial is to give you a basic understanding of how to create a database and add data to it.
What we have now is an empty table with just columns defined. What we would do next is to populate the table with data.
Inserting rows into a Table.
Adding rows to a table can be done in several ways which depends on the size of the data, the format in which the data comes in etc. For large amount of data you will most likely use the import method to add data to the database but to get started we will manually add a few rows using an INSERT INTO … VALUES statement that specifies the target columns and the data values.
You can open up the query tool again or simply erase the create table statement you just ran. Then type in the following query.
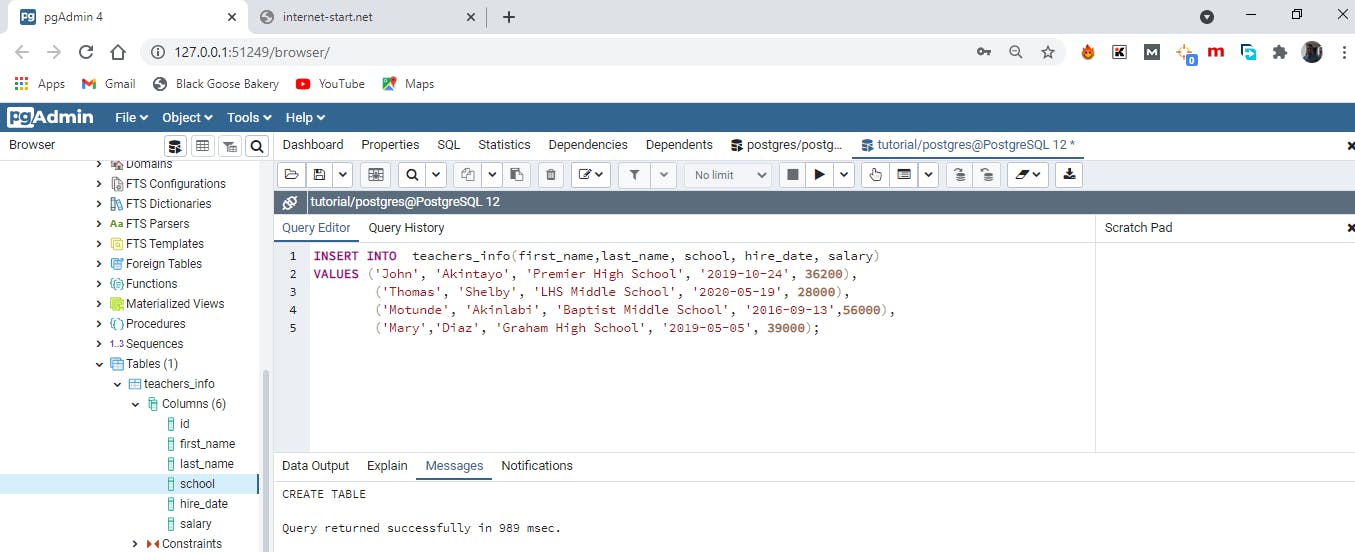
When you run it correctly you will get a notification ‘Insert 4’ telling you that 4 rows has been added to the table.
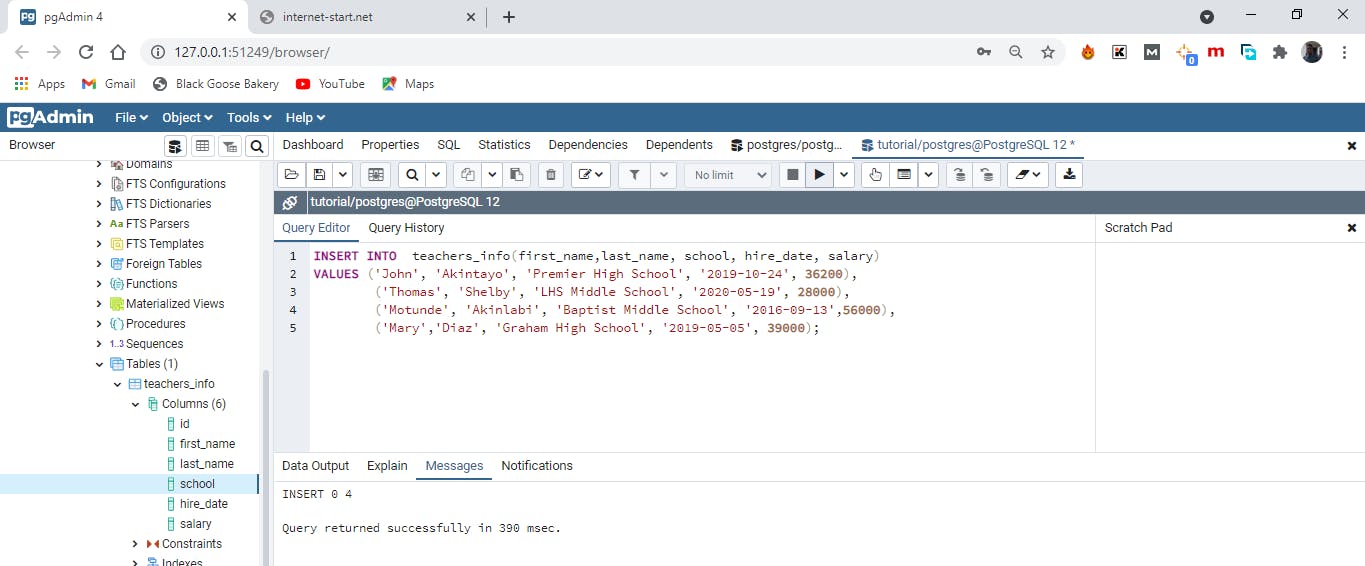
What did this code block just do?
The above code block inserts name and data for four teachers. The first line INSERT INTO is a standard SQL keyword followed by the name of the table you have created and in parentheses are the name of the columns contained in the table all separated by a comma. This line of code tells PostgreSQL you want to insert data into this table(teahers_info). The next line contains another keyword ‘VALUE’ which contains the data to insert into each column in each row. So in other words we are telling PostgreSQL "INSERT INTO this table certain VALUES". The data for each row is enclosed in a set of parentheses and inside of each row a comma is used to separate each column value. The order of the values most also match the order of the columns specified after the table name. Each row of data ends with a column and the entire statement with a semicolon.
Certain values that are inserted are enclosed in quotes but some are not. This has to do with SQL requirements where text and dates requires quotes while numbers do not. The date column uses YYYY-MM-DD format which is the international standard for date formats. If you notice carefully, when we were creating the table and defining the columns we created a column called id which we defined with a data type of bigserial but when we were inserting values into rows we do not account or it. This is because the data type bigserial automatically fills the id column with an auto incrementing integer.
Viewing the data.
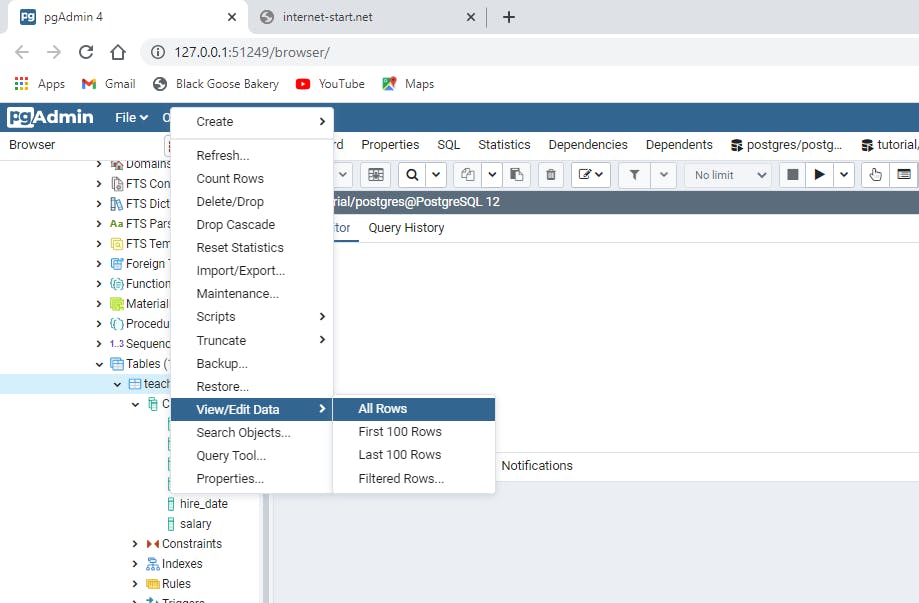
You can take a quick look at the data you just loaded into the teachers_info table by locating the table ,right-click and in the pop up menu choose view/edit data -> all rows.
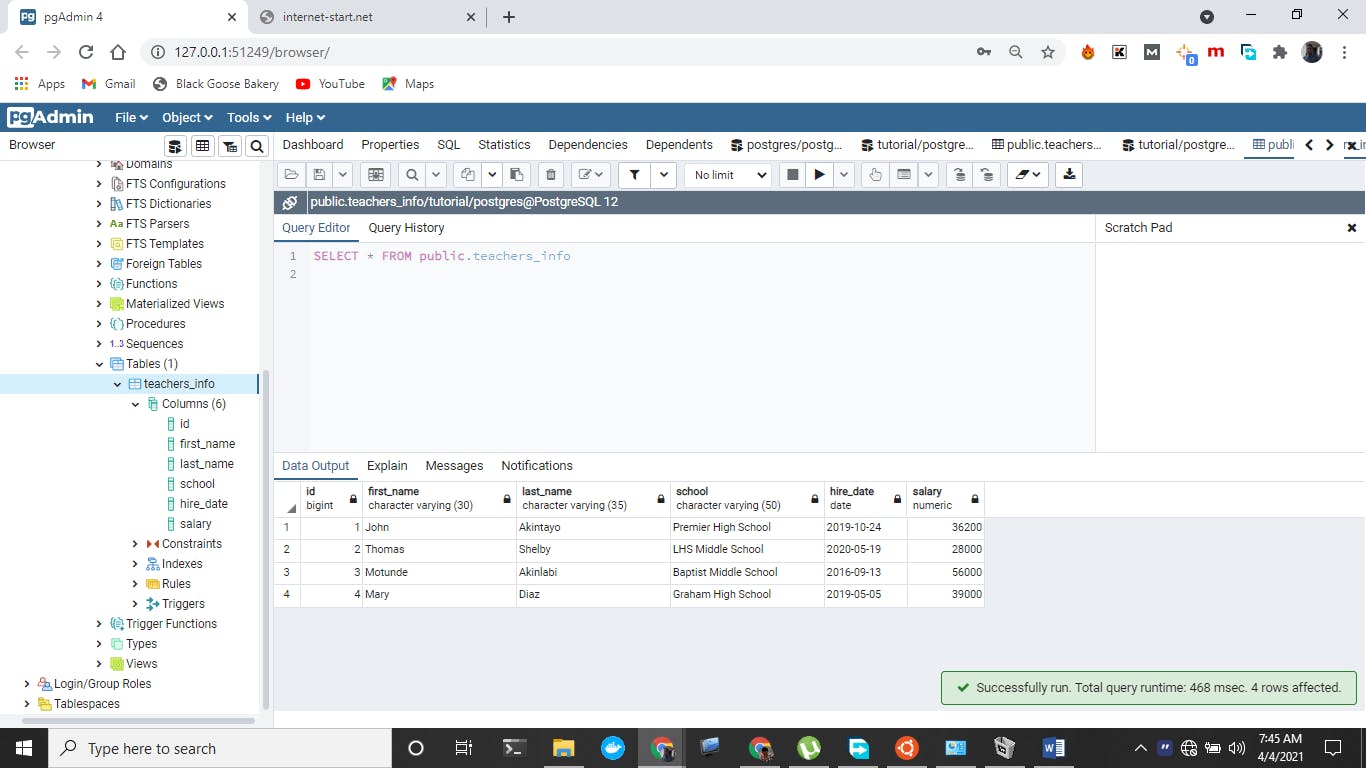
Hooray we are 99.9% percent done here. Most times we want to manipulate date in our database and not just view it like we have done above and I know you will be eager to want to write queries that will manipulate your database. So on this note I will round up this blog post with a query that would be easy to understand.
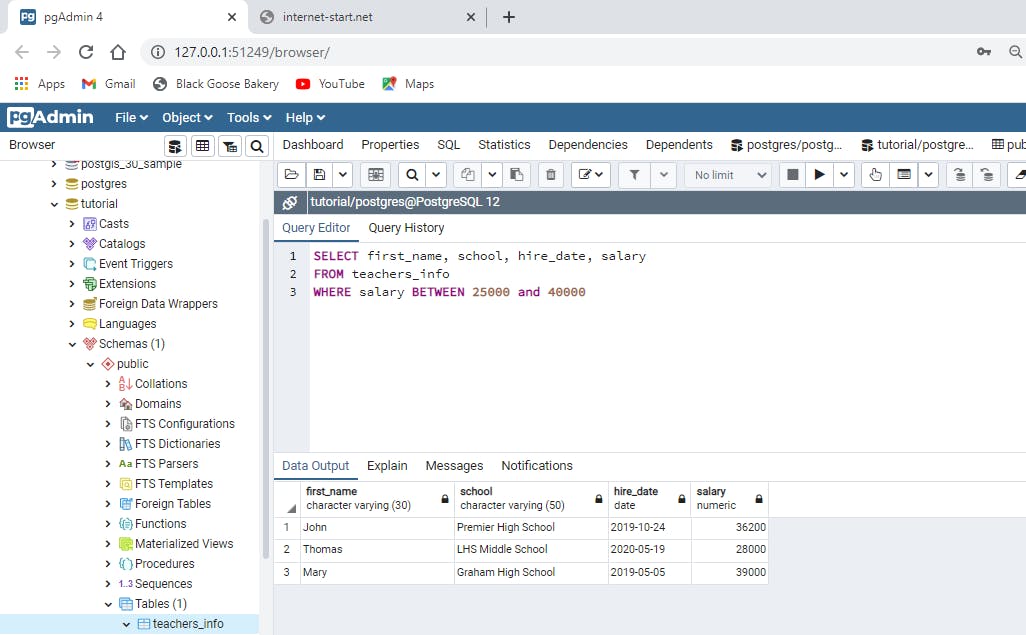
What the above query does is request PostgreSQL serve up rows of data where the salary range is between 25000 and 40000 and also display only the first_name, school, hire_data and Salary. This is a very simple query that makes use of the WHERE keyword to filter the table data. This brings us to the end of this blog post. Future posts will deal with extracting data from a database. I hope this post was helpful, if you find it useful you could share it with others, leave a comment and follow me on twitter and connect with me on LinkedIn. Thank you.